So I just wanted to take you through the steps you will go through as you setup your spenditures account.
I will break up the process into 5 steps:
- Create Account and set your preferences
- Set your budget categories
- Add your debit or credit card accounts
- Categorise your transactions
- Check your budget
So let’s get started.
1. Create account and set your preferences
First you will need to register an account here, Once submitted you will immediately be logged in and be taken to your profile page where you can set your preferences.
These preferences tell spenditures how you want spenditures to treat transactions it pulls in, allows you to specify who to notify and how often to notify of budget status updates so you stay on top of your budget, and you will also be able to setup 2-factor authentication which further secures your account beyond your password.
2. Set your budget categories
Once your preferences are set, the next thing you’ll be guided to do is set your budget categories.
There will be some default ones provided for you but feel free to rename them or move them around as you wish. These are completely customisable to your needs.
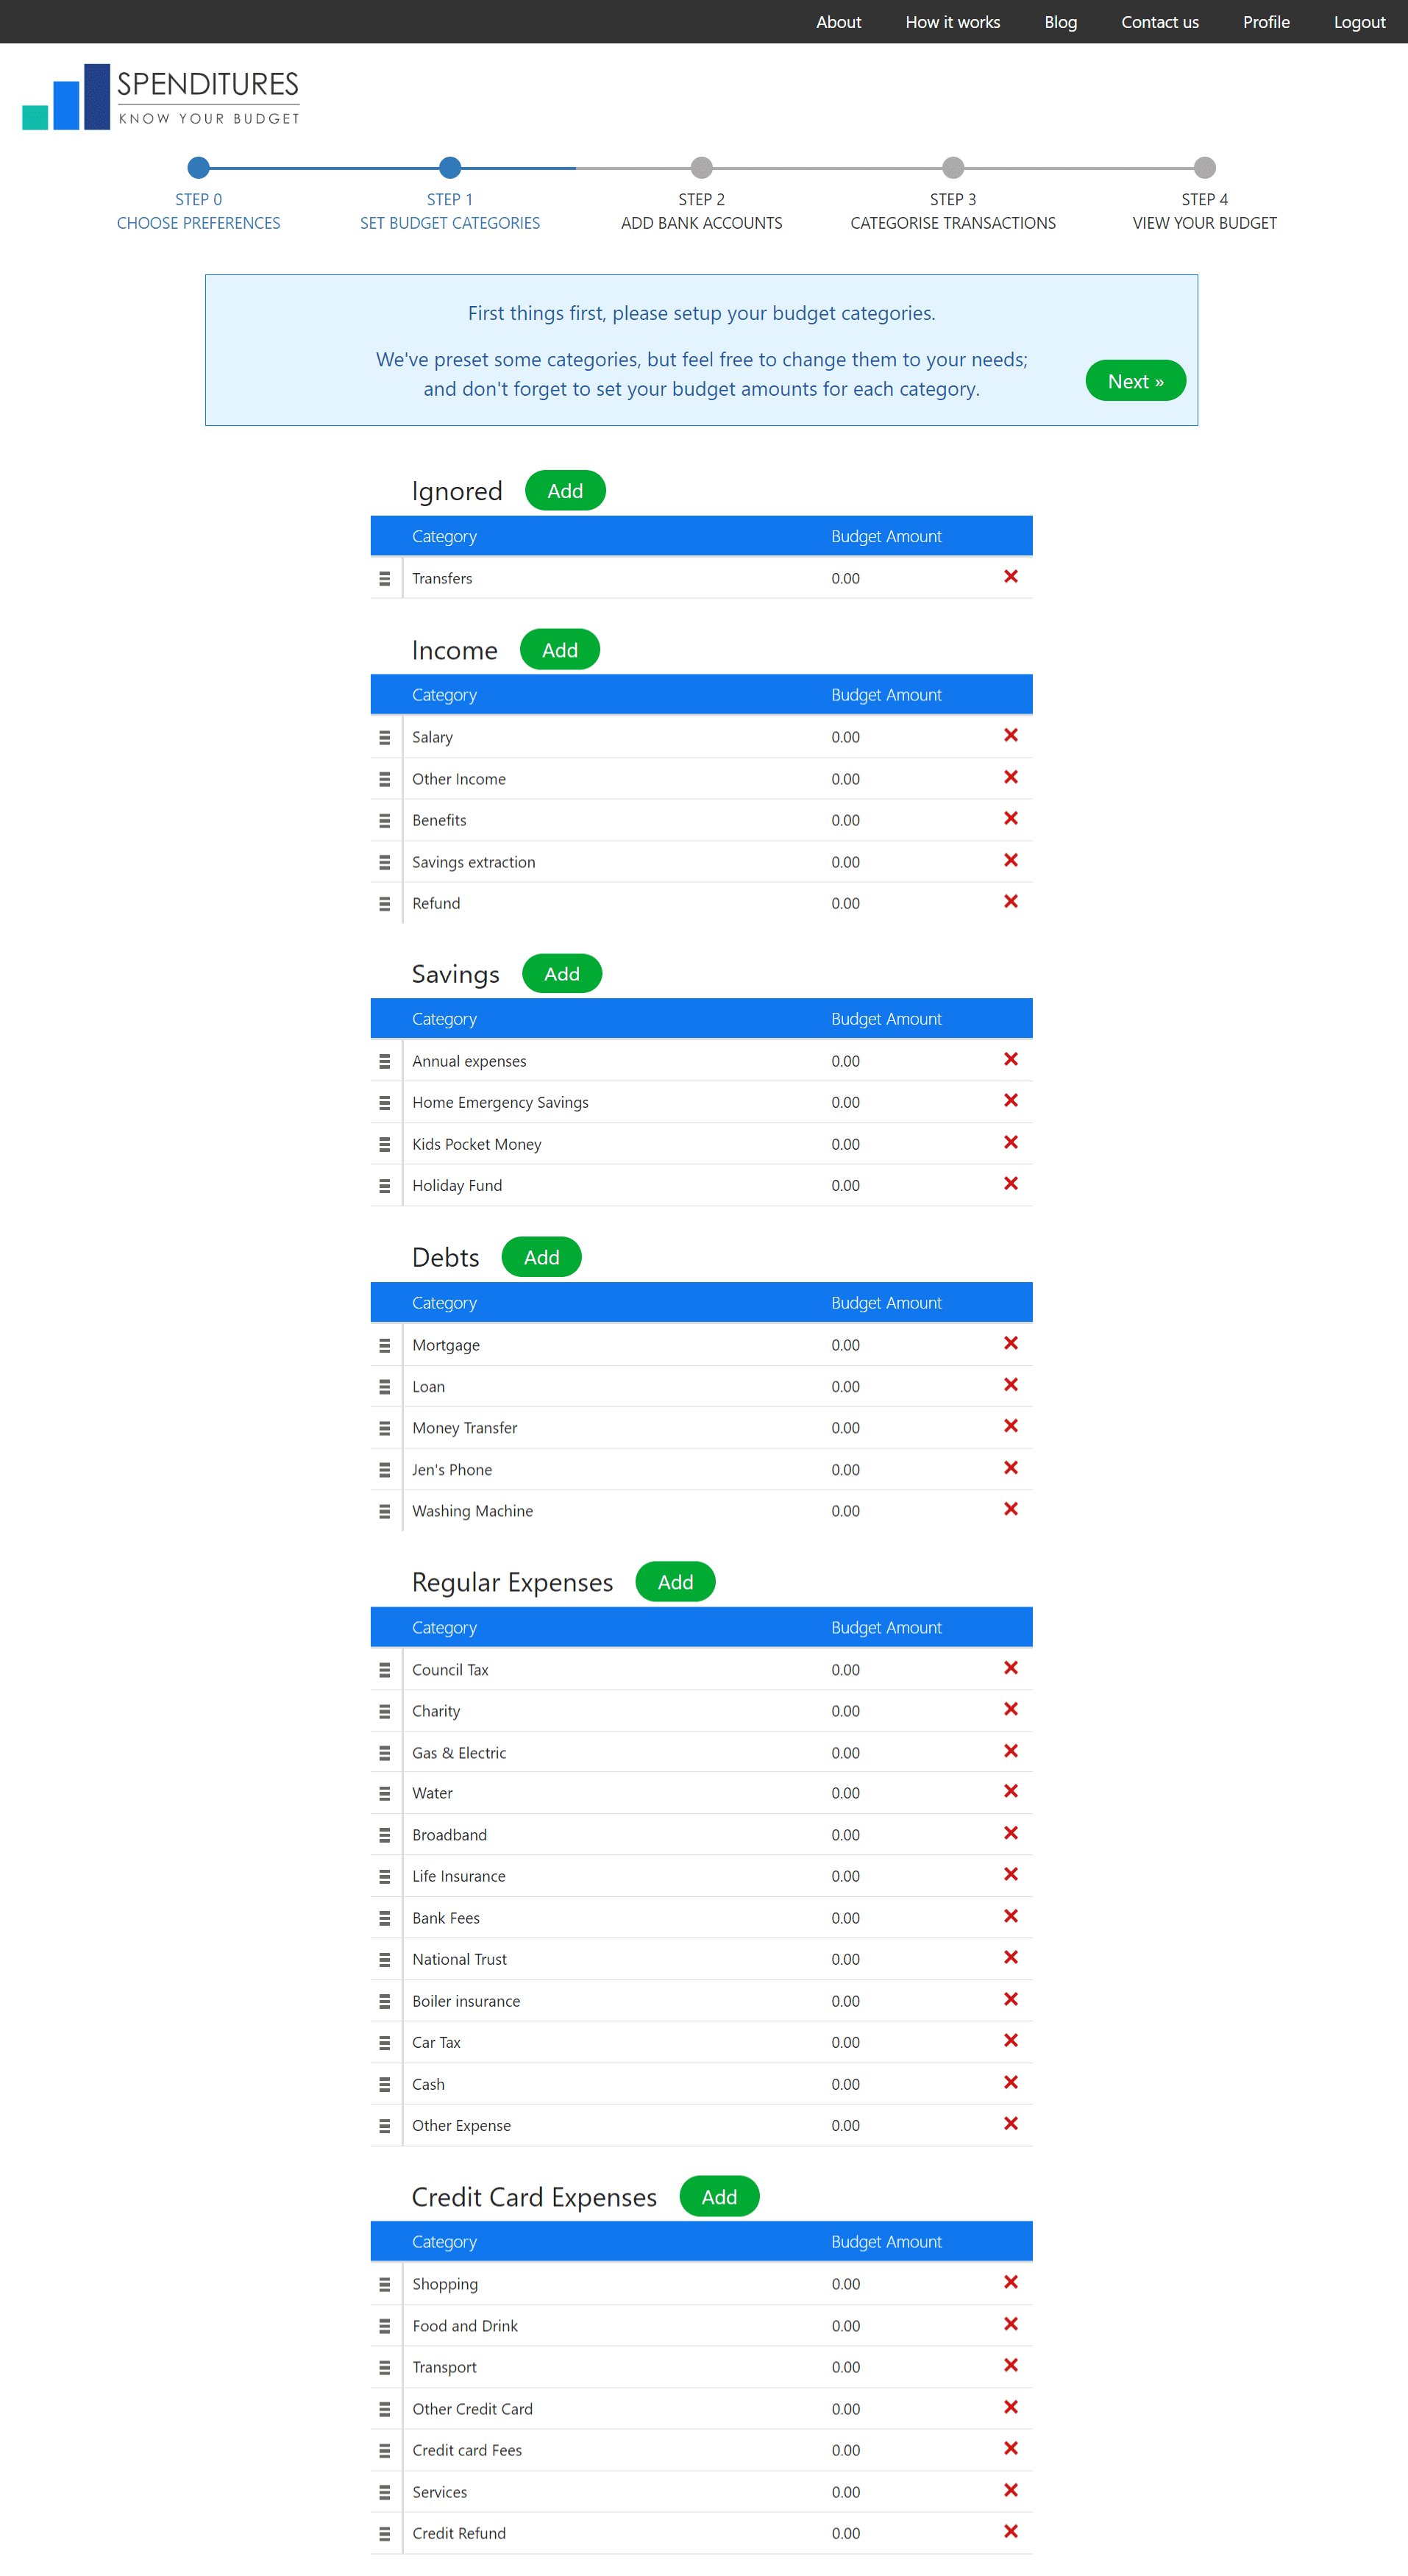
If you know what how much you spend or wish to spend each month for these budget categories, you should enter them now. This will be helpful later for spenditures to be able to project what your spending might ideally look like into the future, allowing you to better plan your finances.
3. Add your debit or credit card accounts
Once you’re done setting your budget categories, you’ll move on to adding your debit cards accounts where you get paid and from which you pay off your credit cards and your credit card accounts.
This is what that will look like.
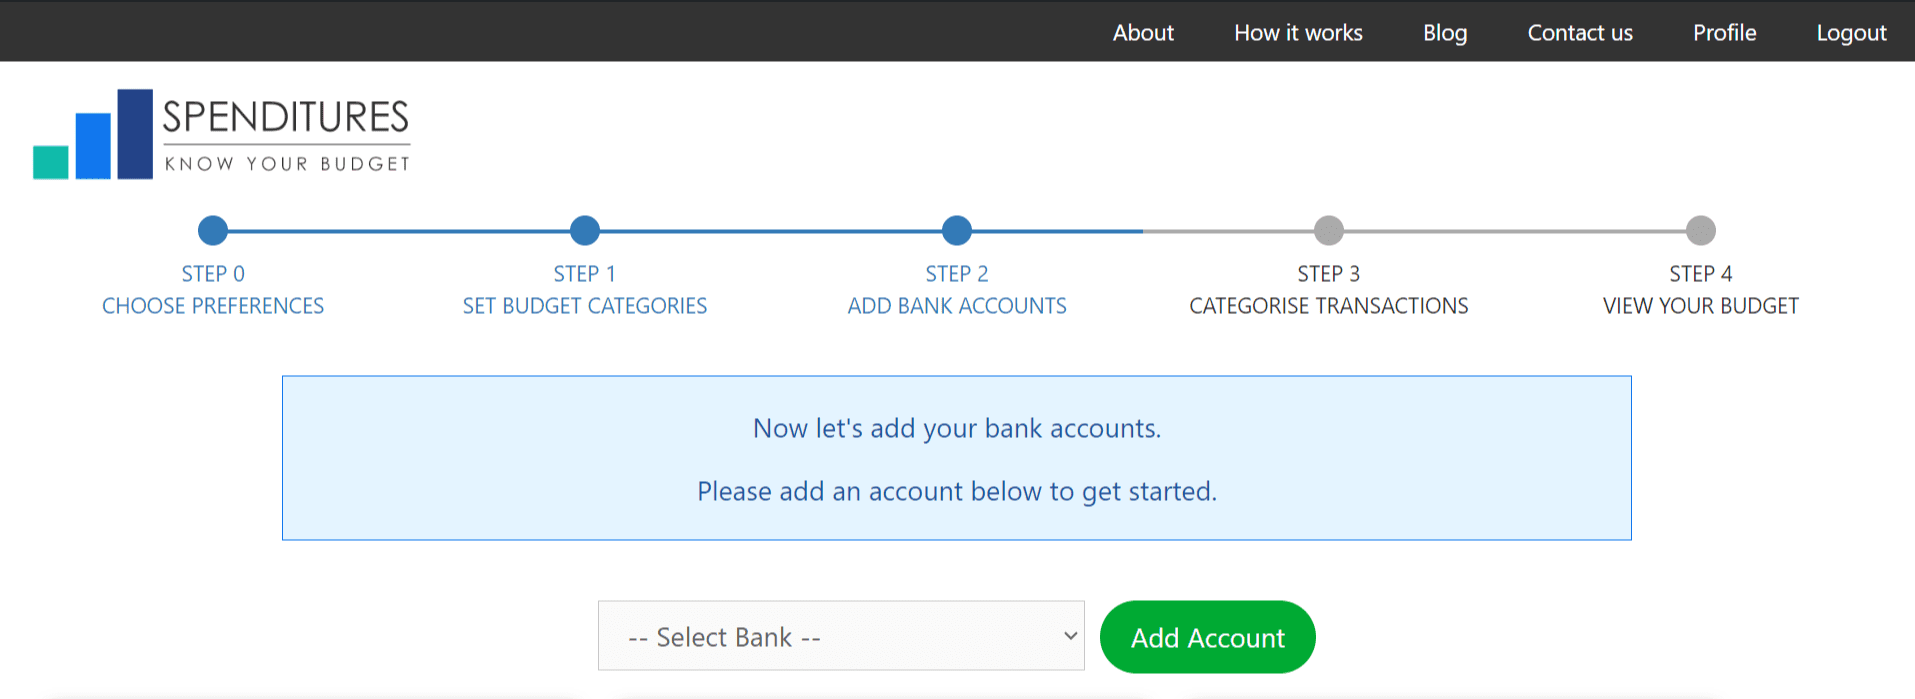
After you’ve added your credit card account you will want to make one important update to them. That is to set the statement day for each credit card. The statement day is the day of the month which you receive your statement for that credit card.
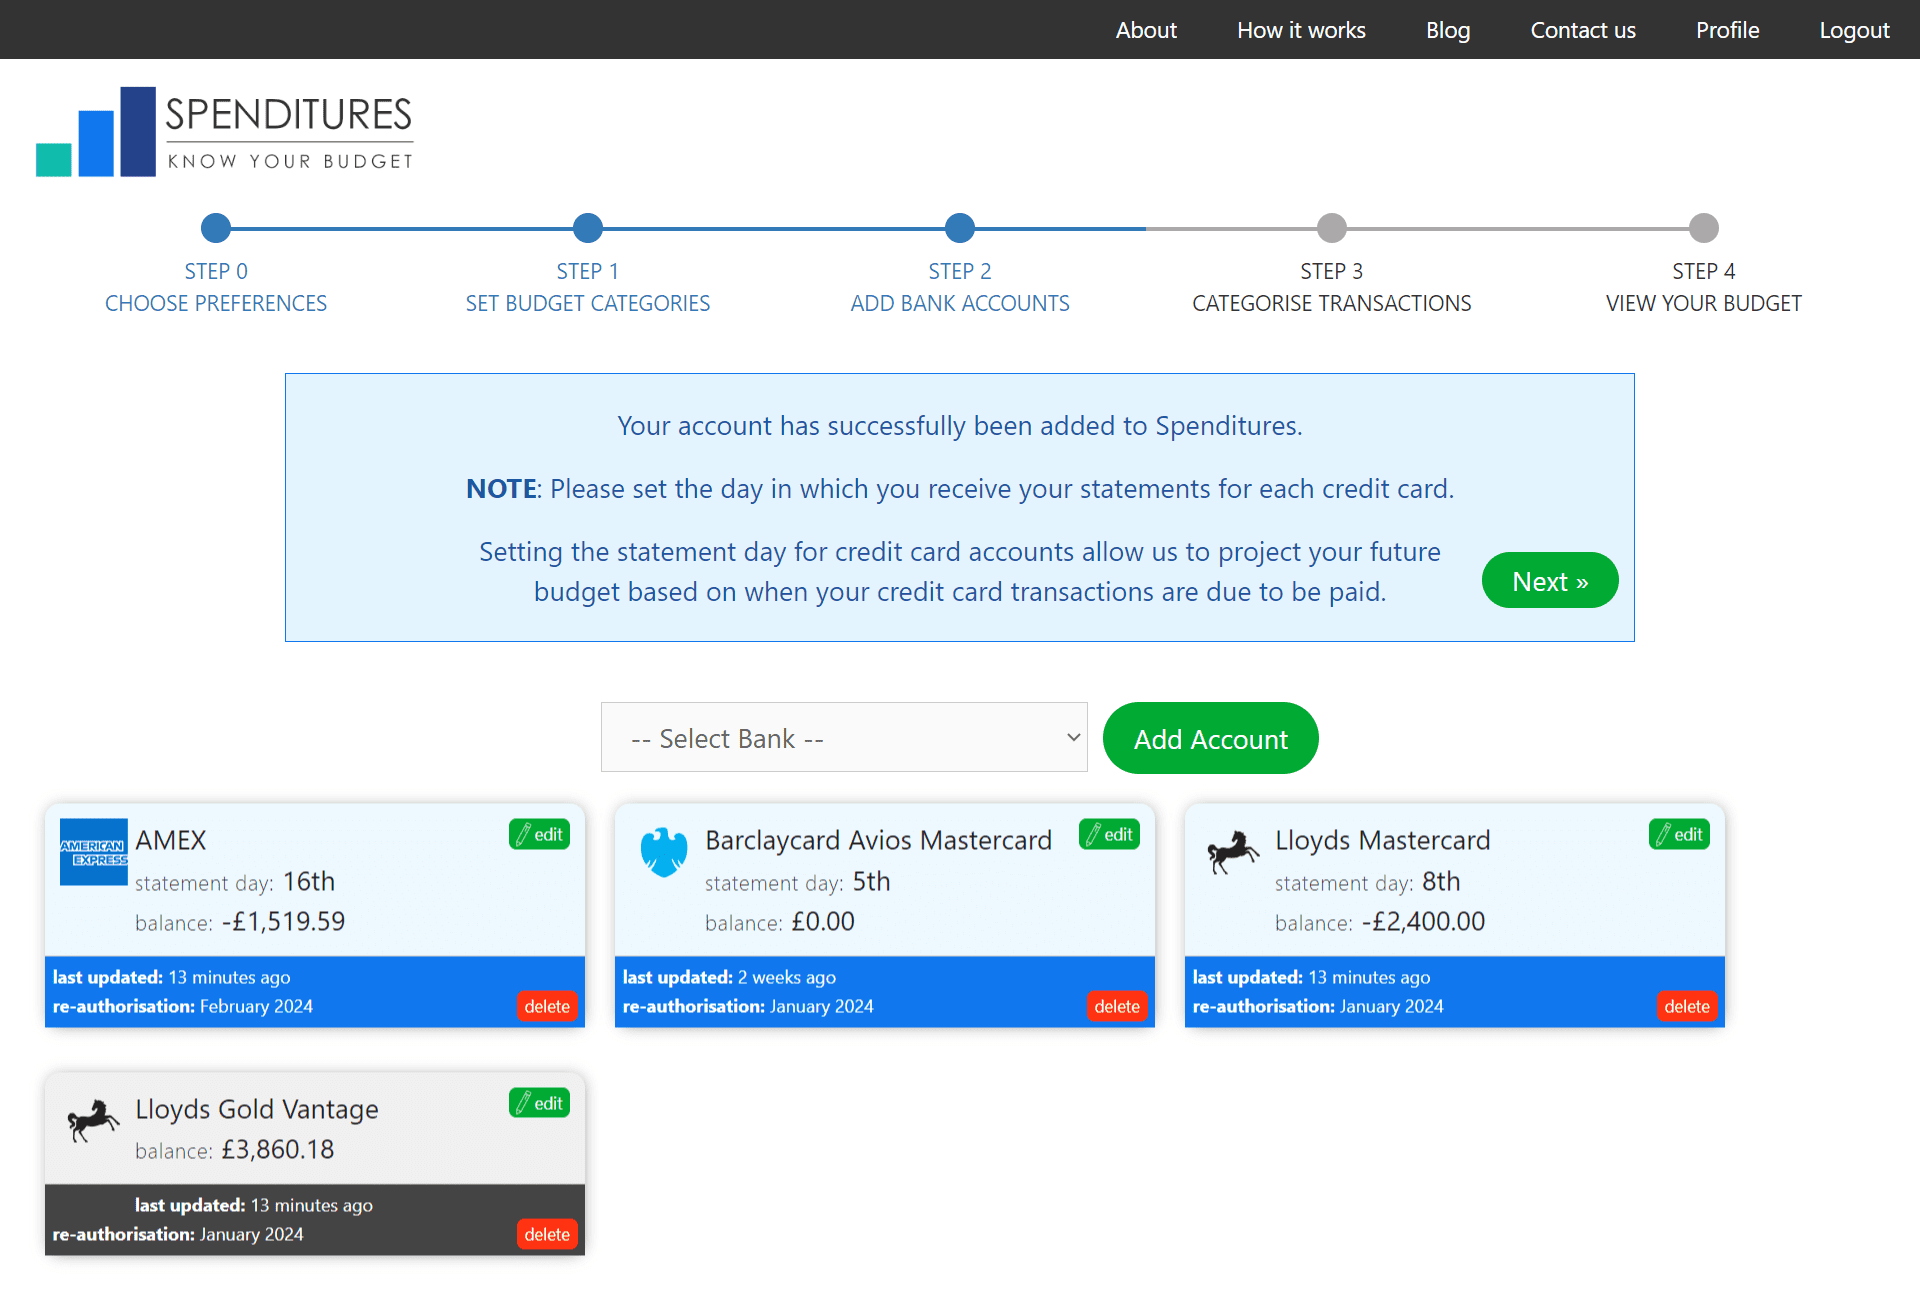
The reason this is an important step is, it tells spenditures when it pulls in a transaction, when you might be paying for that transaction.
eg. If you receive your credit card statement on the 8th of each month, then spenditures knows that if you make a purchase on 6th or 7th, it will be due to be paid the following month, but if you make a purchase in the 8th or 9th, it will only be due to be paid in two months time. And so, it can properly place your transactions in the correct budget month when it will need to be paid.
4. Categorise your transactions
Once you’ve added your debit and credit card accounts, it’s time to fetch all your transactions and categorise them.
This is what the transactions page will look like
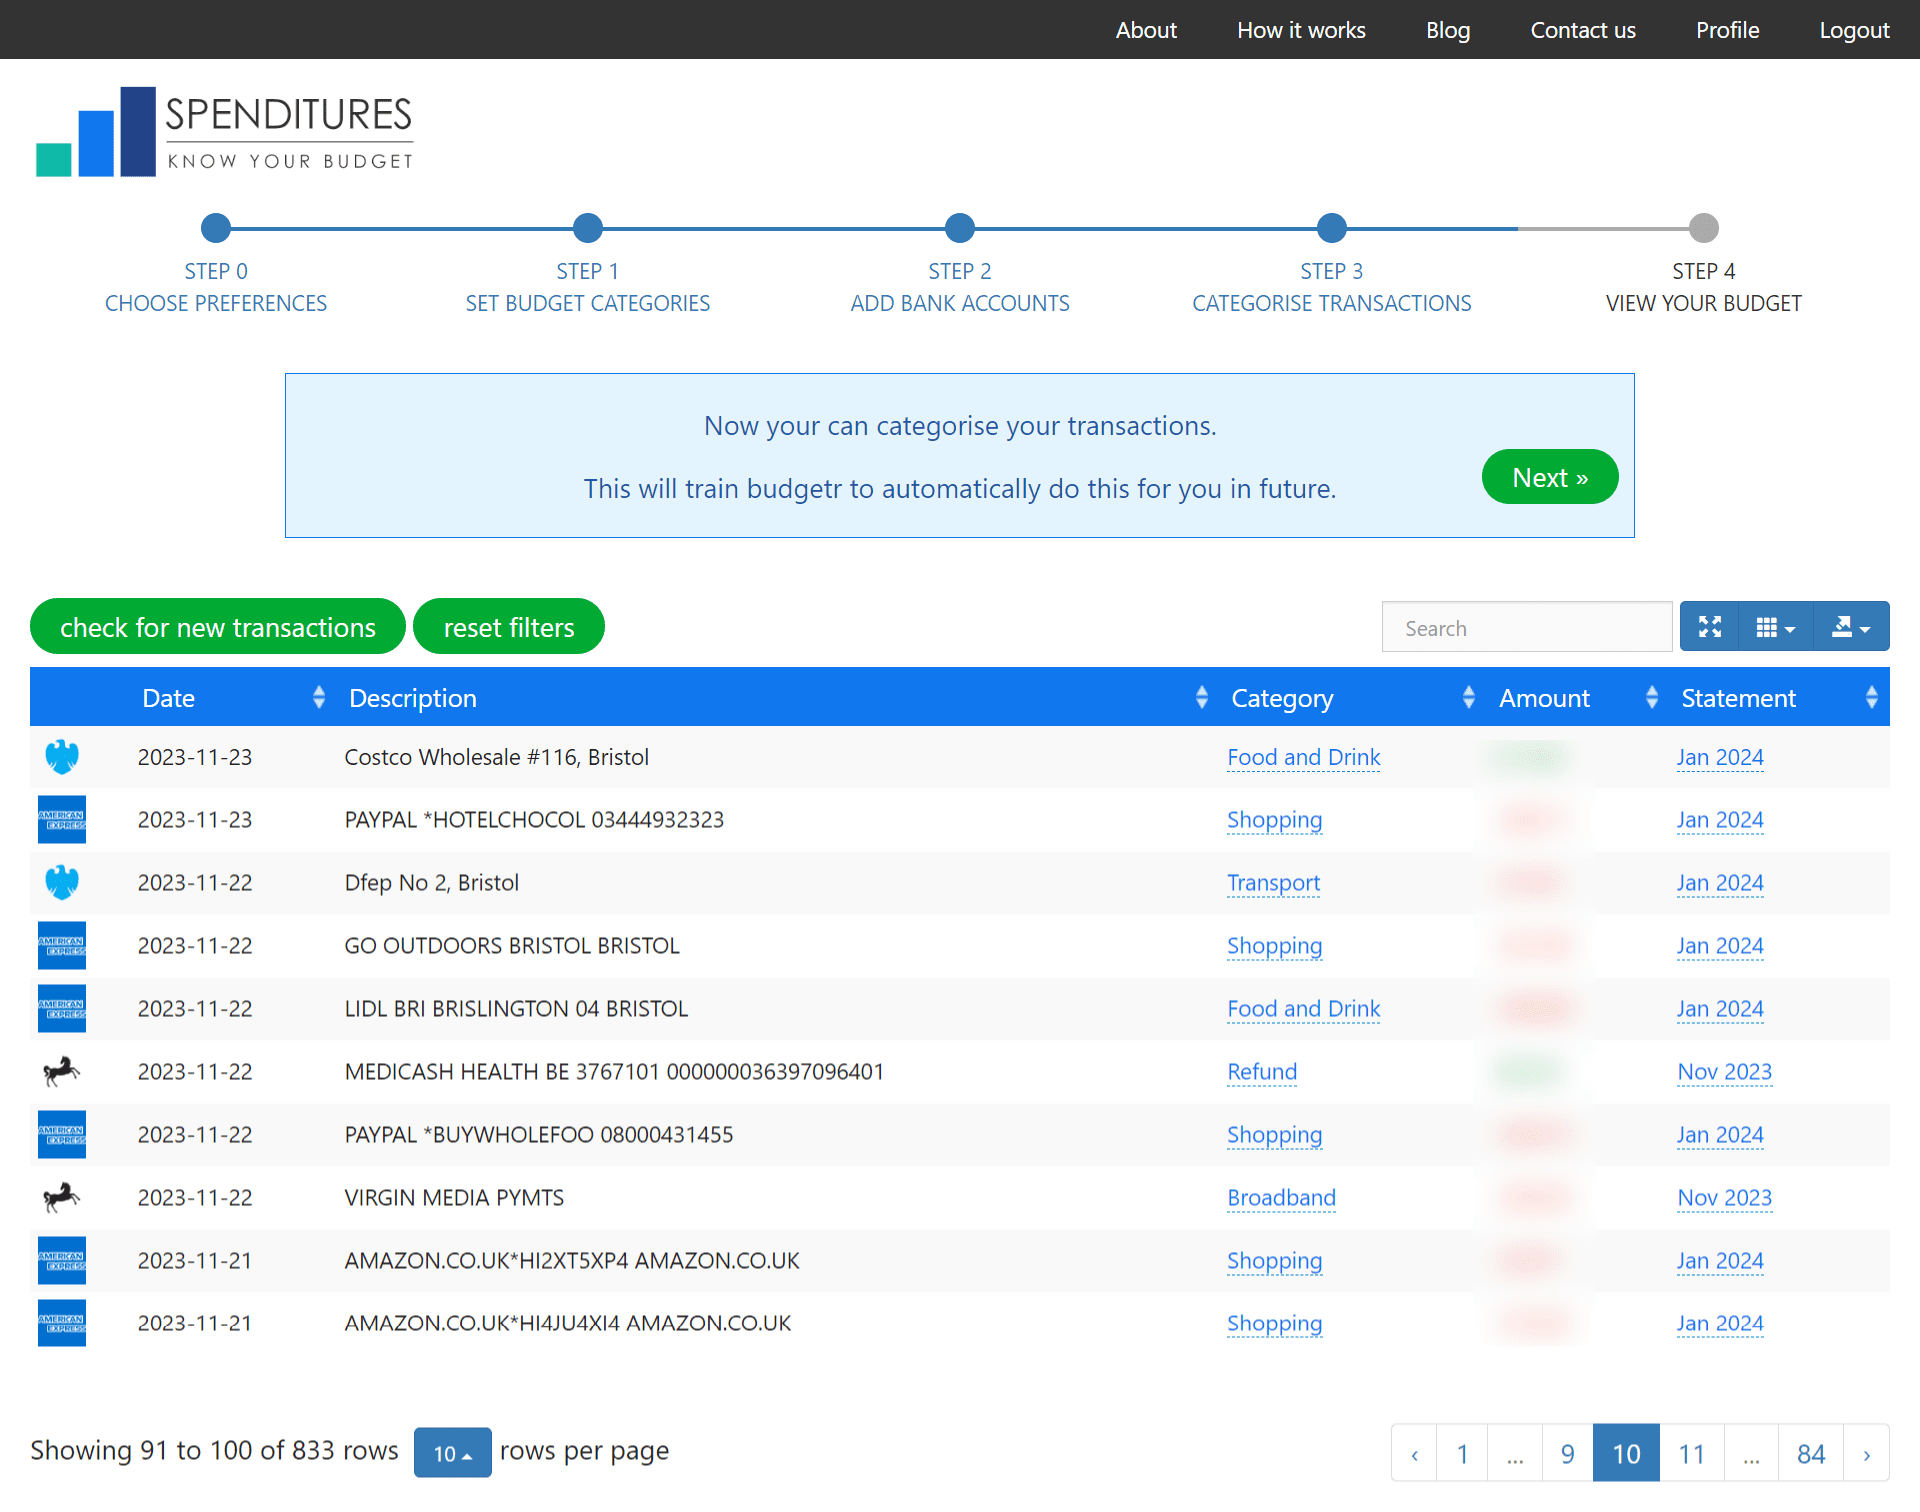
As you categorise a transaction, spenditures will look for similar transactions and ask if you want to categorise those also at the same time, so hopefully this process won’t take so long.
And as you categorise your transactions, you will be training spenditures, so that in future it will be able to categorise your transactions automatically for you.
5. Check your budget
So now everything should be setup and you’re ready to check out your budget. Move on to the last step and check out what your monthly budget looks like.
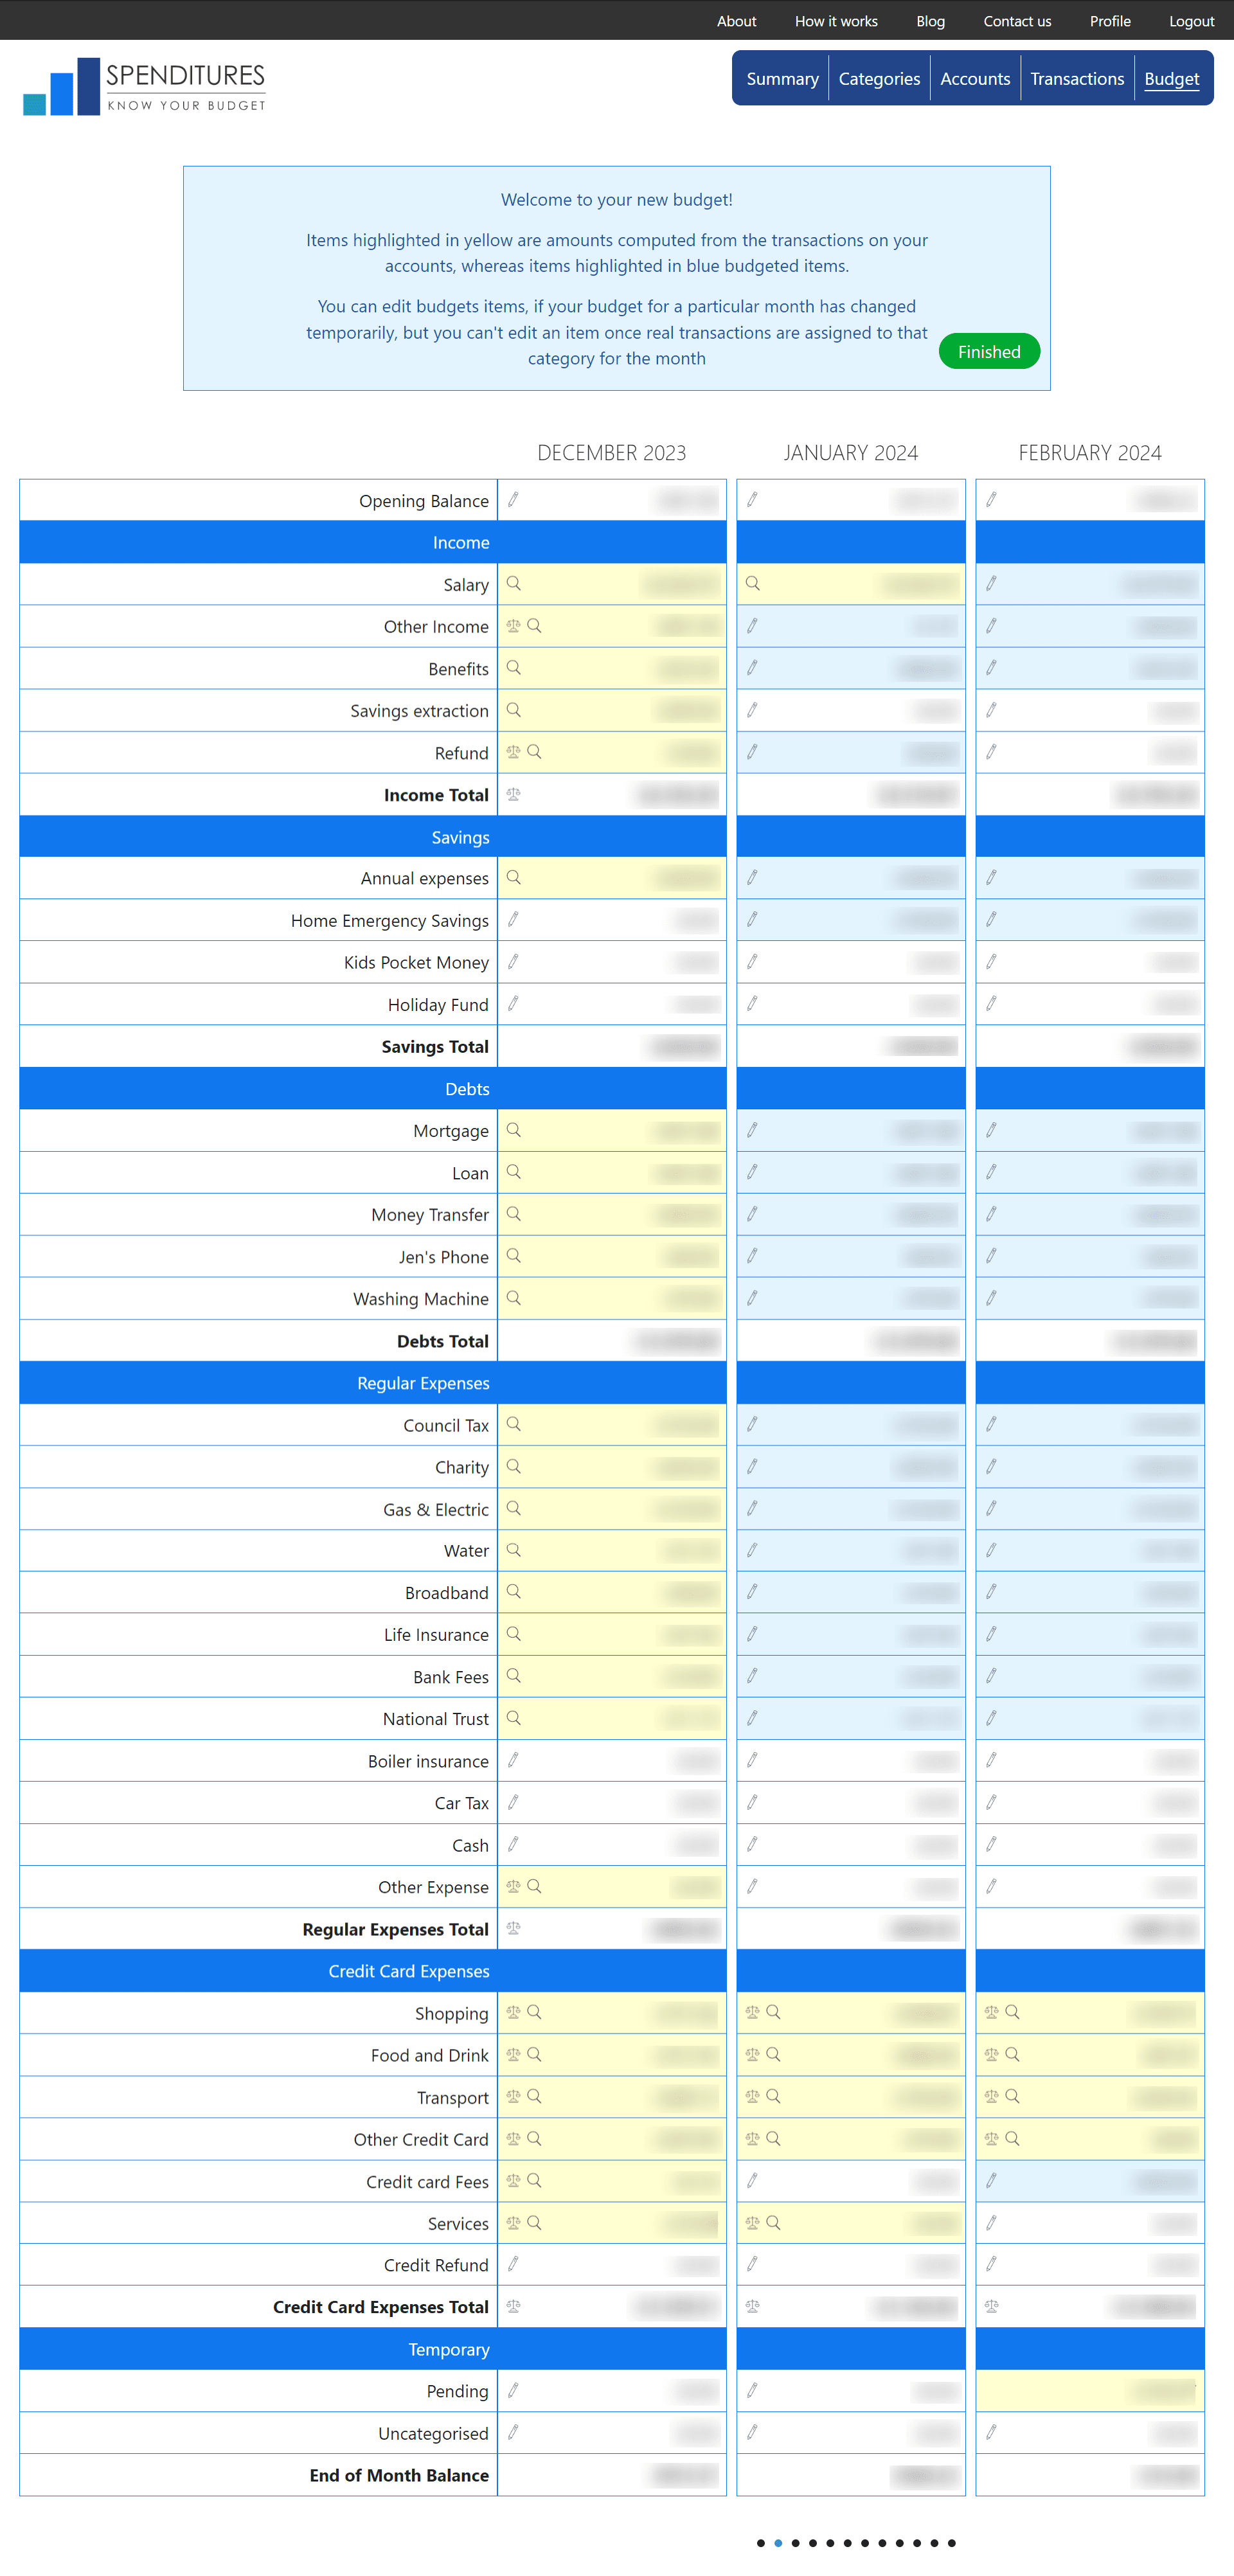
You will notice some cells are highlighted in blue and others are in yellow.
- Blue cells are projected spending based on your budget.
- Next to each blue cell there will be an edit icon which allows you to adjust your projected spending on a category for a particular month.
- Yellow cells contain amounts calculated from actual spending. You will see next to each yellow cell there will be a magnifying glass – this will show you which transactions are added up to make up the value in that cell
- The scale icon will show you how your spending compares against your budget for that category
So that’s it, now that your budget is setup, spenditures will continue to check your accounts for new transactions from time-to-time, automatically pull them in categorise them and place them in the correct budget month so that your budget is always up to date with your current spending and your budget is just a click away.
I hope this guide was valuable and you will invest the time to setup your spenditures budget.

